The email from the provider is short and unfriendly. Outbound scanning detected on port 22, network access to your instance has been rate limited, respond within 24 hours. You SSH in, find a process you don’t recognise chewing a core, kill it, delete the binary out of /tmp, and write back saying it’s handled.
Three days later you get the same email.
That gap is the whole problem with compromised VPS recovery. Killing the process removes the symptom. It does nothing about the SSH key that got added to a service account, the systemd timer that pulls a fresh payload every twenty minutes, or the reason they got in the first time. You cleaned up artifacts. You never closed the access.
This post is about what you can honestly fix in place, what you can’t, and how to tell the difference before you sink a weekend into a box you’re going to rebuild anyway: evidence handling, the access paths and persistence people miss, why package verification proves less than it looks, and the one in-place technique that genuinely holds up.
What compromised VPS recovery actually means
There are two goals hiding inside “recover the server” and they pull in different directions.
- Restore service. Get the site back, stop the abuse traffic, keep the client happy. Fast, and you can do it on the same instance.
- Restore trust. Be able to say, with something behind it, that nothing on this machine is executing code you didn’t put there. Slow, and on a machine where someone had root, often impossible.
A reinstall is not a technical superstition. It’s the cheapest way to buy the second goal. You throw away every byte you can’t account for and start from a base image plus config you control. Cleaning in place buys you the first goal quickly and the second one slowly, sometimes never.
So the default answer is still: rebuild from a known-good image, restore validated data, re-point DNS. What follows is for when that isn’t available today, or when you have to investigate before you’re allowed to destroy anything.
Decide this first: how deep did they get
Everything else follows from this. The depth of the compromise decides whether in-place recovery is defensible or wishful thinking.
Unprivileged application code
A web shell dropped in a document root, running as the PHP-FPM pool user or www-data. It can read what that user reads, write where that user writes, and make outbound connections. It cannot touch /usr/bin or install a kernel module.
In-place recovery is reasonable here, as long as you can prove the blast radius stayed inside that user. That proof is the hard part, not the cleanup.
A service account with a path upward
Same as above, but the account has a sudoers entry, write access to a systemd unit directory, membership in the docker group, or a writable script that root runs on a schedule. Treat this as a root compromise until you’ve disproved it, because all four of those are one command away from root.
Root
Now the machine can lie to you. Root can replace ps, edit the package database, truncate logs, and set the immutable attribute on files so your own cleanup silently fails. Anything the live system tells you is a claim, not a fact.
You can still investigate. You cannot honestly certify the result. If someone needs a clean bill of health, rebuild.
Kernel
A loadable kernel module or an eBPF program that hides processes, files and network connections from userspace. Your tools return whatever the rootkit decides they should return. There is no in-place recovery here, only offline analysis of the disk and a rebuild.
Before you touch anything, keep the evidence
The first fifteen minutes decide how much you’ll be able to learn later. Most of what tells you how bad it is only exists while the box is running, and most of it gets destroyed by the instinctive reaction.
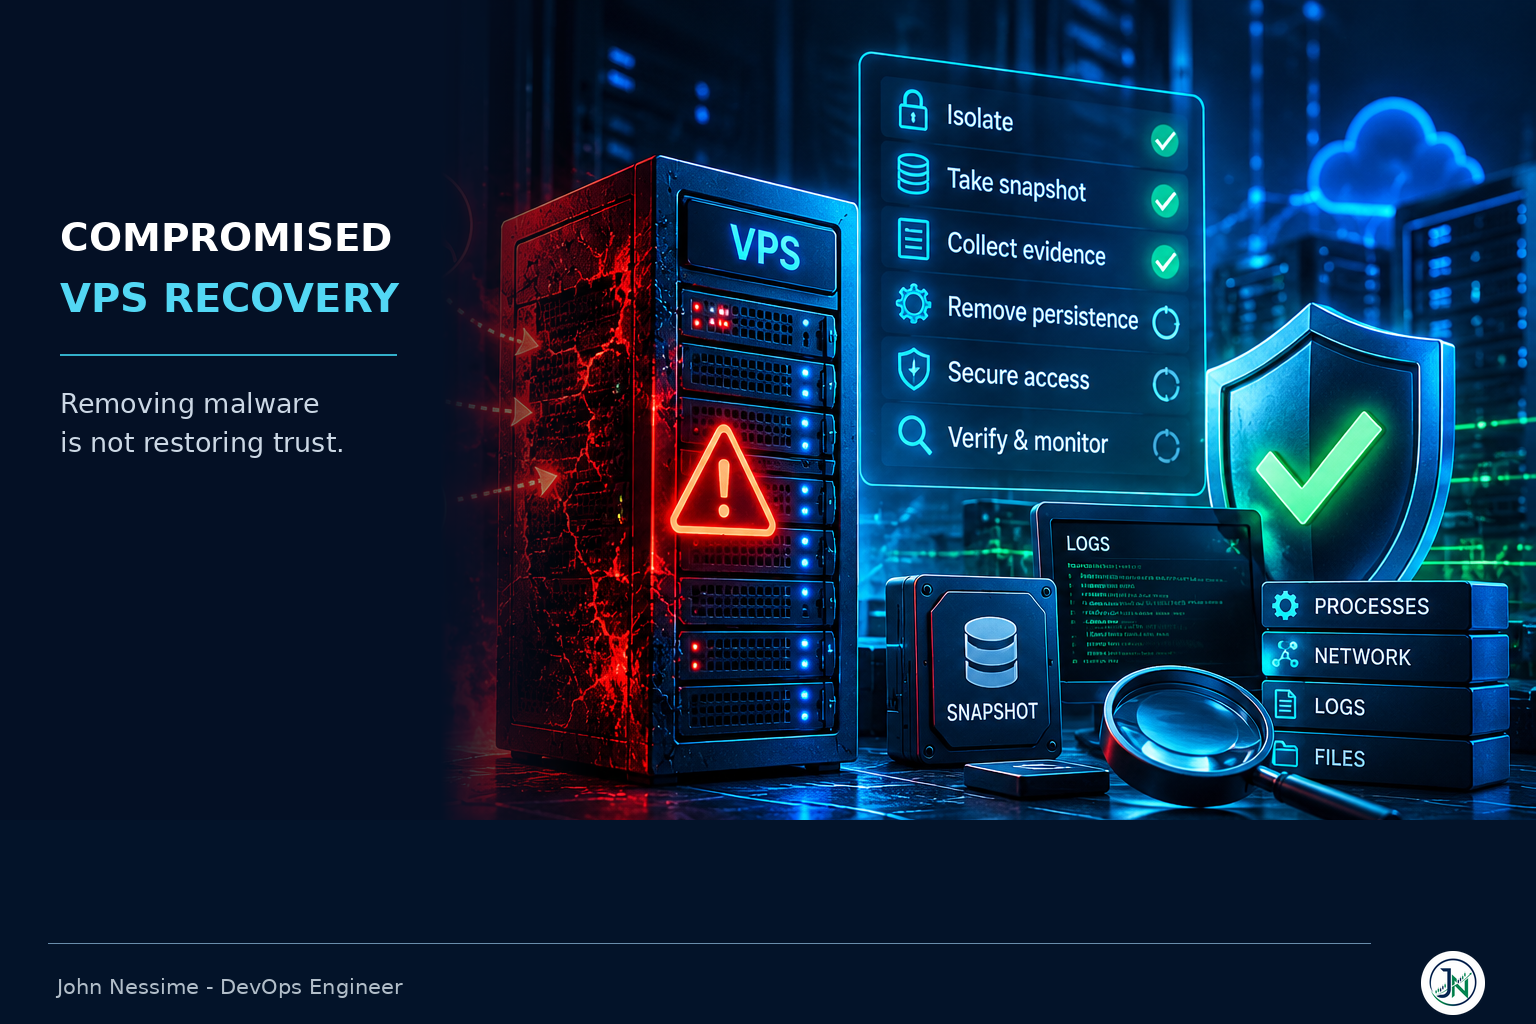
- Isolate at the edge, not from inside. Use your provider’s firewall or security group to cut everything except your own source address. Running
ip link set eth0 downfrom an SSH session locks you out and does not stop a local timer from running. - Take a snapshot. Every serious VPS provider offers one, and it costs almost nothing to keep for a couple of weeks. This is your only chance at a copy of the disk in its compromised state. Providers like Hetzner, Contabo, OVHcloud and InterServer all expose snapshots or images from the control panel.
- Collect volatile state before you reboot. Sockets, processes, open files and the mapping from process to on-disk binary all disappear the moment the box restarts.
- Copy the collection off the box. To your workstation or a bucket, not to another directory on the same instance.
A collection pass that fits in a couple of minutes:
# Sockets with owning process, numeric, TCP and UDP
ss -tunap > /tmp/ir-sockets.txt

# Process tree, full command lines
ps auxf > /tmp/ir-ps.txt

# Where each PID's executable actually lives on disk.
# A deleted binary still running shows up as "(deleted)".
for p in /proc/[0-9]*; do
  echo "$p -> $(readlink "$p/exe" 2>/dev/null)"
done > /tmp/ir-exe.txt

# Logins, including failed ones
last -F -f /var/log/wtmp > /tmp/ir-last.txt
lastb -F                 > /tmp/ir-lastb.txt 2>/dev/null

# Journal for the suspect window
journalctl --since "7 days ago" --no-pager > /tmp/ir-journal.txt
The readlink loop is the one people skip and then wish they hadn’t. A process whose executable was unlinked after launch is a strong signal on its own, and it’s the only place the original path survives.
If auditd was already running, pull its logs too. If it wasn’t, note that for the rebuild rather than installing it now on a machine you don’t trust.
Failure family 1: you removed the payload and left the door
This is the one that produces the second abuse email. Access mechanisms are boring, they don’t show up in top, and they survive every cleanup that focuses on running processes.
# Authorized keys for every account that has a home directory
for h in $(getent passwd | cut -d: -f6 | sort -u); do
  [ -f "$h/.ssh/authorized_keys" ] && echo "== $h" && cat "$h/.ssh/authorized_keys"
done

# sshd may have been told to read keys from somewhere else entirely
grep -Ei 'AuthorizedKeysFile|AuthorizedKeysCommand|PermitRootLogin|PasswordAuthentication|^Match'
  /etc/ssh/sshd_config /etc/ssh/sshd_config.d/*.conf 2>/dev/null

# Any account with UID 0 other than root
awk -F: '($3 == 0) {print}' /etc/passwd

# Accounts that can actually log in
awk -F: '$7 !~ /(nologin|false)$/ {print $1, $7}' /etc/passwd

# Sudo grants, including drop-in files
cat /etc/sudoers; ls -la /etc/sudoers.d/
Two of these deserve more attention than they usually get. AuthorizedKeysFile pointing at a path outside a user’s home means your audit of ~/.ssh/authorized_keys proves nothing. And a Match block near the bottom of sshd_config can quietly re-enable password authentication or root login for one user or one source address while the top of the file still looks locked down.
Also check /etc/pam.d/ for modules you don’t recognise. PAM is a legitimate extension point, which is exactly why it’s a good hiding place, and a single added line can accept any password for a given account.
Failure family 2: persistence in the places you didn’t check
Cron gets checked. The rest usually doesn’t. MITRE ATT&CK catalogues these as separate techniques for a reason: they’re independent, and finding one tells you nothing about the others.
# Per-user crontabs and the system drop-in directories
for u in $(cut -d: -f1 /etc/passwd); do crontab -l -u "$u" 2>/dev/null; done
ls -la /etc/cron.d/ /etc/cron.hourly/ /etc/cron.daily/ /var/spool/cron/

# systemd: enabled units and every timer, including inactive ones
systemctl list-unit-files --type=service --state=enabled
systemctl list-timers --all
systemctl cat suspicious-unit.service   # shows the actual ExecStart

# Per-user systemd units survive logout when lingering is on
ls -la /root/.config/systemd/user/ /home/*/.config/systemd/user/ 2>/dev/null
loginctl list-users

# One-shot at jobs, frequently overlooked
atq

# Dynamic linker hijacking
cat /etc/ld.so.preload 2>/dev/null

# Shell and login hooks
ls -la /etc/profile.d/ /etc/update-motd.d/ 2>/dev/null
grep -rn 'curl|wget|base64|/dev/tcp' /root/.bashrc /home/*/.bashrc
  /etc/bash.bashrc 2>/dev/null

# Unexpected setuid binaries and file capabilities
find / -xdev -perm -4000 -type f 2>/dev/null
getcap -r / 2>/dev/null
/etc/ld.so.preload is worth understanding rather than just grepping. Any library listed there is loaded into every dynamically linked process before anything else, which lets it intercept ordinary libc calls. That’s how a userspace rootkit makes readdir skip its own files and ps skip its own processes without touching the kernel. If that file exists on a machine where you didn’t put it, everything you’ve observed so far is suspect.
The other one to internalise is timers. A cleanup that looks successful, followed by reinfection at a suspiciously round interval, is almost always a systemd timer or a cron entry you didn’t enumerate. systemctl list-timers --all matters because a timer that isn’t currently active is invisible without the flag.
Failure family 3: verification that verifies less than you think
Package managers keep hashes of the files they installed, so you can ask the distro whether anything on disk drifted from what shipped.
# RHEL, AlmaLinux, Rocky, Fedora: verify every installed package
rpm -Va

# Debian and Ubuntu: dpkg's own verify, no extra package needed
dpkg -V

# Optional on Debian/Ubuntu, checks more files than dpkg -V
debsums -s
In rpm -Va output, the character positions are the checks that failed: 5 is a changed digest, S size, T timestamp, M mode. A c after the flags marks a config file, and config files change legitimately all the time. A modified digest on something in /usr/bin or /usr/sbin does not.
Now the caveats, because this is where people talk themselves into a false clean bill of health:
- It only covers files that came from a package. A web shell in your document root, a binary in
/tmp, a rogue systemd unit and anything you compiled yourself are all invisible to it. - The database and the verifying binary both live on the machine being verified. Root can edit both.
- Timestamps and sizes are trivially restorable. A digest change with an unchanged size and timestamp is a specific tell that someone tried to cover their tracks.
Treat findings as strong evidence and a clean result as weak evidence. That asymmetry is the useful part.
Application-level checksums
For anything running WordPress, WP-CLI covers the gap the package manager leaves, because it verifies against checksums published by wordpress.org rather than anything stored locally:
wp core verify-checksums
wp plugin verify-checksums --all
Neither command covers themes or premium plugins that aren’t in the public repository, so pair them with a modification-time sweep of the document root.
Rootkit scanners
The honest case for rkhunter and chkrootkit: they’re free, they run in a minute, and they catch known families and common mistakes that an experienced pair of eyes might skim past. Running one costs you nothing.
The limit: they’re signature and heuristic based, they check for kits that were known when the signature set was written, and they ask the same possibly compromised kernel and libc that everything else asks. A clean scan means the obvious things aren’t there. It is not a negative result.
Failure family 4: the way in is still open
If you finish the cleanup without an answer to “how did they get in”, you haven’t finished. You’ve just reset the clock.
The practical technique is to find the earliest artifact you’re confident about, then read the access logs around that timestamp. Attackers rarely land quietly on the first attempt, and the noise before the successful request is usually more legible than the request itself.
# Files in the document root modified in the last two weeks
find /var/www -xdev -type f -newermt '14 days ago' -printf '%T+ %pn' 2>/dev/null | sort

# Same idea for the usual drop locations
find /tmp /var/tmp /dev/shm -xdev -type f -newermt '14 days ago' -ls 2>/dev/null
The usual suspects, roughly in the order I check them: an outdated plugin or CMS component with a public exploit, an admin panel exposed to the whole internet, a weak or reused password on an account with a shell, a deploy key or CI token leaked into a repository, and a service bound to 0.0.0.0 that was only ever meant to be local. Redis and an unauthenticated Docker socket are the two that come up most in that last category.
If your logs for the relevant window are gone, that absence is itself a finding. Shipping logs off-box to somewhere append-only, whether that’s a hosted platform or your own Loki instance, is the single change that would have made this investigation tractable. Worth noting for the rebuild.
The in-place technique that actually holds up
Everything above shares a weakness: you’re asking a possibly compromised system to describe itself. There’s one way around that which doesn’t require a reinstall, and it’s the reason I don’t dismiss in-place work entirely.
Boot the VPS into your provider’s rescue image, or attach a snapshot of the disk to a second clean instance. Then mount the target filesystem read-only and inspect it from a kernel the attacker never touched.
# In the rescue environment: identify the target disk
lsblk -f

# Mount read-only. On ext4 add noload, on XFS add norecovery,
# so the kernel doesn't replay the journal and write to the disk.
mkdir -p /mnt/target
mount -o ro,noload /dev/vdb1 /mnt/target      # ext4
# mount -o ro,norecovery /dev/vdb1 /mnt/target  # xfs

# Inspect without chrooting into it
ls -la /mnt/target/etc/cron.d/
cat /mnt/target/etc/ld.so.preload 2>/dev/null
find /mnt/target/etc/systemd/system -newermt '30 days ago' -ls
Why this is different in kind, not just degree: a userspace rootkit hooking libc, or a kernel module hiding directory entries, works by intercepting calls on the running system. Mounted from outside, those files are just bytes. Nothing gets to filter what you see.
Two things to keep straight. Don’t chroot into the mounted filesystem and start running its binaries, because you’ve just handed control back to the attacker’s code. And read-only isn’t automatic: mounting a dirty ext4 or XFS filesystem will replay the journal and write to the device unless you pass the option that suppresses it, which is enough to invalidate the copy if anyone later cares about chain of custody.
When your checks disagree
- Package verification is clean but the behaviour continues. The payload isn’t in a packaged file. Look at the document root,
/opt,/usr/local, and anything in a home directory. That’s most of the filesystem, and none of it is covered. - A process has no matching binary on disk. The executable was unlinked after launch. Check
ls -l /proc/PID/exefor the(deleted)suffix and the original path, then find what restarts it, because something must. - A file refuses to be deleted as root. Check
lsattrfor the immutable attribute and clear it withchattr -i. Attackers use this specifically because it makes casual cleanup fail silently. - Rebooting appears to fix it and it comes back on a schedule. Enumerate every timer and cron path again, including
systemctl list-timers --alland per-user units under lingering sessions. - Journal entries are missing for the interesting window. Run
journalctl --verify. Truncation is a finding, not a dead end, and it argues for moving to the offline path. - The outbound traffic continues after you’ve killed everything. You’re either looking at a hidden process or a second compromised container on the same host. Confirm from the provider’s traffic graphs rather than from tools on the box.
Arguments for staying in place that don’t survive contact
- “The rootkit scanner came back clean.” It checked for known kits using tools running on the suspect system. Absence of evidence, and weak absence at that.
- “I rotated all the passwords.” Passwords are one access path. SSH keys, API tokens, sudo rules, PAM modules and scheduled jobs are the others, and none of them care about your password reset.
- “It’s only a web shell, the OS is fine.” Sometimes true, and it’s the one case where in-place recovery is genuinely defensible. But it’s a conclusion you have to earn by ruling out privilege escalation, not an assumption you start from.
- “I restored from backup.” Restoring content doesn’t remove a key from
/root/.ssh, and if the backup predates your detection by less than the dwell time, you’ve restored the compromise. Know when the earliest artifact appeared before you pick a restore point. - “I don’t have time to rebuild.” The honest version of this is a real constraint, not a technical argument. But if your infrastructure is described in code and your data restore is tested, a rebuild is often faster than the second cleanup, never mind the third.
How I’d decide
- Snapshot first, always. Before any judgement call. It’s cheap and it’s the only irreversible decision in the whole process.
- Isolate at the provider edge and collect volatile state while the box is still up.
- Establish depth. Did anything run as root? If you can’t answer that with evidence, assume yes.
- If root is on the table, plan the rebuild now and treat the in-place work as investigation rather than remediation. The two goals stop competing once you’ve decided which one you’re pursuing.
- If it stayed inside one unprivileged account, clean in place: remove the payload, close the access paths, patch the entry point, rotate every credential that account could read.
- Do the offline read-only pass anyway. It’s twenty minutes in a rescue image and it’s the only evidence that doesn’t depend on the compromised machine’s cooperation.
- Rebuild the hardening on the new instance, not the old one. Key-only SSH, an allowlist on the admin port, automatic security updates, off-box logging, and file integrity monitoring with AIDE or a platform like Wazuh, so the next incident starts with a baseline instead of guesswork.
On that allowlist point: restricting SSH to a fixed source address is the single highest-value control here, and it’s the one people skip because their own IP changes. A VPN with a dedicated IP, which providers like NordVPN and Surfshark both offer, or a Cloudflare Tunnel in front of the admin path, gives you a stable origin to allow without exposing the port to the internet.
Frequently asked questions
Can you ever recover a hacked Linux server without reinstalling?
Yes, when the compromise stayed inside an unprivileged application account and you can demonstrate that it did. Once anything ran as root, you can restore service in place but you cannot honestly certify the machine is clean, because every tool you’d use to check runs under the code you’re checking for.
Should I reboot the VPS as soon as I notice something wrong?
Not first. A reboot destroys the process list, open sockets, and the mapping from running processes to deleted binaries, which is often the most informative evidence available. Snapshot, isolate at the edge, collect volatile state, then reboot if you need to.
How long do attackers usually stay before I notice?
Long enough that you should be suspicious of any restore point close to your detection date. Rather than trusting a published average, find the earliest artifact you’re confident about on your own machine, then add margin. If your logs don’t reach back that far, that’s a finding in itself.
Is restoring from a backup enough after a compromise?
Only if the backup predates the intrusion and covers everything that was modified. A content-only restore leaves SSH keys, cron entries, systemd units and package changes in place, so it usually removes the visible damage while preserving the access. Restore data onto a fresh instance instead of over a compromised one.
What’s the fastest way to check for a compromised VPS?
Sockets with owning processes (ss -tunap), authorized keys across every home directory, every timer including inactive ones (systemctl list-timers --all), /etc/ld.so.preload, and package verification. That’s a few minutes and it catches the majority of commodity intrusions. It will not catch a competent one.
Do I need to tell my hosting provider?
If they contacted you about abuse traffic, yes, and quickly, because unanswered abuse reports lead to suspension. It’s also worth asking whether they can supply traffic graphs for the affected period. That data comes from outside your instance, which makes it more trustworthy than anything on it.
If there was personal data on the server, does that change anything?
It changes the order of operations. Preserve the snapshot before you clean anything, document what you did and when, and check your notification obligations before the technical work absorbs your attention. Cleanup that destroys evidence is a much bigger problem when the incident is reportable.
The one thing worth remembering
Compromised VPS recovery isn’t really a cleanup procedure. It’s a decision about what you’re able to claim afterwards.
If the intrusion stayed inside an unprivileged account and you can show it, clean in place and move on. If root was ever involved, every check you run on that box is a statement from a machine with a motive. Take the snapshot, do the offline read-only pass because it’s the only view the attacker doesn’t control, and put the rebuilt hardening on a fresh instance rather than the one you’ve been arguing with.
And find the way in. A cleanup that doesn’t end with a patched entry point isn’t a recovery, it’s an interval.
Need a second pair of eyes on a compromised server?
Incident work is unpleasant to do alone and easy to do in the wrong order. This is the kind of thing I help with:
- Triage on a live VPS: establishing depth of compromise, collecting volatile evidence before it’s lost, and giving you a straight answer on clean-in-place versus rebuild
- Offline analysis of a snapshot or rescue-mode disk, including timeline reconstruction from filesystem timestamps and whatever logs survived
- Full enumeration of access paths and persistence: SSH configuration, PAM, sudoers, cron, systemd units and timers, preload hooks and setuid binaries
- Finding the entry point rather than just the payload, correlating web and auth logs against the earliest artifacts on disk
- Rebuilding the server properly afterwards, in code, with key-only SSH, an admin allowlist, off-box logging and file integrity monitoring in place from day one
- WordPress and PHP application cleanup where the compromise came in through the stack rather than the OS
If you’re in the middle of one right now, send me the output of ss -tunap, your systemctl list-timers --all, and the abuse report if you got one. That’s usually enough to tell you how deep this goes.